Sunday, November 17, 2019

Valentine Countdown Calendar

Hi and welcome to my blog! I am so glad you stopped by :)

Today I wanted to show you just how versitile the Countdown Calendar is. When I first got mine I made one side the Christmas theme and then made the other side for Halloween. If you want to see those projects you can go here.

I had a Christmas Countdown Class and one of the ladies wanted to make the other side of her Countdown Calendar into a Valentine theme since her anniversary and birthday were in February.


I think it turned out pretty good :) I used some of the retired papers that I had that was in the All My Love Suite. But, you could use any of our current papers and they would look amazing. A few come to mind like the Pressed Petals, Perinnial Essence, and Mosaic Mood.

What do you think?
Thanks for stopping by. Have a great day!
 Robin


Thursday, November 14, 2019

Tropical Chic Tag Card

Hi everyone and welcome!

 If you saw my last post then you saw the card I made using the Tropical Chic Stamp  and Die Set with my favorite DSP  Feels Like Frost.  When I cut my paper down to fit on my card it left me with a 2" X 6" piece of paper. Well..... I hate wasting paper (I may be a bit of a hoarder lol).

I found an awesome sketch that I thought  would be able to let me use the leftover piece and make another card using the same items, but in a different way!

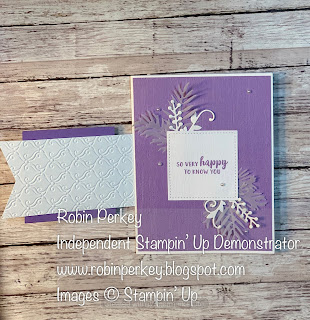
 I used a card base of Pretty Peacock and added a layer of silver foil, then added a layer of   Whisper White card stock  that I embossed using the subtle EF. .I cut my strip of paper down to 4 1/2" and used my Delightful Tag Topper and punched the top to make it into a tag. Then I used my Pretty peacock ink and a dauber to add color onto my tag. After stamping the leaves and flower , I die cut them out and added them to my card along with some silver leaves to add some more interest . Instead of wasting the sheet of foil that you were only going to see the edges of ..I die cut my embellishments out of it lol...(I did mention I was a hoarder didn't I? )

This is the finished card. What do you think?


If you're like me and are more of a visual person then here is the video for ya :)

https://youtu.be/PxXhMkoAo7s


The measurements I used are
Pretty peacock  Card Stock 11" X 4 1/4"" Scored in half at 5 1/2"
Silver Foil Paper 5 3/8" X 4 1/8"
Whisper White CS 5 1/4" X 4"
Feels Like Frost DSP 4 1/2" X 2"
Inside layer Whisper White 4" X 5 1/4"

I  have also entered this card into a couple challenges over at Stampin' Up! Only Challenges and Just add ink. You can click the link below if you want to enter your cards in their challenges!!
SUOC 236: Embellishments
Just add Ink ~ Sketch challenge #482

Have a great day everyone! 

Monday, November 11, 2019

Feels like Frost Meets Tropical Chic


Hello and Welcome! I’m so glad you stopped by. It is time for our monthly blog hop and I’ve got  a great encouragement card for you. 

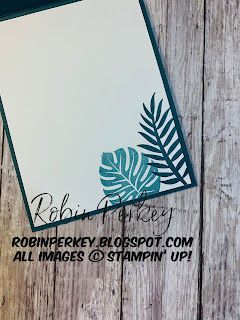
I love the Feels like Frost paper and think that if you just use it a little differently then you can get a whole new look from what I call “winter themed” paper.  I added some of our gorgeous pretty peacock ink and the Tropical Chic stamp set and matching dies along with a little Smoky slate and made it a tropical themed card. 


Isn’t that awesome how just adding color changes the whole feel of the paper?!


I made this card to send with another one that I made a week ago. I keep meaning to send them out and time just gets away from me lol. Anyone else have this problem? Hopefully the recipients will like  them. 


Thanks so much for stopping by and don’t forget to check out the other awesome demonstrators playing along in this blog hop. 

Have a great day everyone! 
Robin 


Monday, October 28, 2019

Kylie's International Highlights | Winners Blog Hop

Hi everyone and welcome to


I am so honored that I was able to make the top ten and thank you to everyone who voted for my card!!  I am very thankful to be hopping with the other wonderful and talented demonstrators!

The card I have for you today is one that I made to send to a very sweet lady for her dad :)  Since, I was making it I figured I could use it for this hop also and try to maximize my time! Something I am not very good at LOL.

This card uses the Rooted In Nature Stamp set and matching die set. It is a very beautiful set and can be used for masculine cards and feminine as well. Just by the color inks you are using!  I am not very good at masculine cards.. so I am hoping that he will like this one :)

Now on to the card!


I used the blueberry bushel cardstock as the base for the card.  I really hadn't used it much but it is a very lovely blue. I then used the garden green for the leaves, I stamped off  for the lighter tone of the leaf  that is on the bottom corner. I also used some of the dies that actually just emboss and used them on a strip of white paper. Then used the garden green ink pad and used a makeup brush to add color to the white strip.


I hope you enjoyed today's card!  And,you can check out the other amazing demonstrators with the links below.  Have a great day :)


Sunday, October 13, 2019

Christmas Gleaming

Hi and welcome!! I’m so glad you stopped by!

For my project today I am playing with some of the new products in the occasions catalog. We have some beautiful products for all your seasonal needs. Gorgeous papers, beautiful stamps  and awesome embellishments that add that finishing touch!


I’ve used the Christmas Gleaming stamp set along with the Brightly gleaming paper... can I just say GORGEOUS!  On one side it has muted tones of the colors in that paper suite, buuttt on the other side is a beautiful copper accented paper.
This particular stamp set comes in a bundle or a suite or you can just get the stamp set on its own... But, why would you when those punches are awesome and you get a discount on the bundle lol!!

My card showcases the stamps and paper and I thought I’d make one of the ornaments into a sentiment piece using our new copper metallic ink.


What do you think? It’s really a very simple card the only added extra that I did was to emboss the pretty peacock piece of cardstock. But, it would look with or without the embossing.

Thanks so much for stopping by and if you’d like to see more of my projects just got the follow button. Have a great day!


You can find all these products in my shop Here 

Monday, October 7, 2019

Kylie’s International Blog Hop Oct 2019


Hello!! Thanks for hopping by! I’m so excited to be in the Blog Hop this month.

The theme for this Hop is “encouragement “ which is something I think we all need once in a while!
It’s so nice for someone just to say great job! You’re the best! Or just a simple Thank you can brighten anyone’s day!

So, for today’s project I am using some of my all time favorite paper! The feels like Frost paper. Have you seen it yet? If not you really need to. Heck it out... or better yet let me just show it to you! 😂


Believe me! The picture does not do it justice! It is absolutely stunning. For my card I am also using the bird balled bundle. This bundle comes with some terrific encouraging sentiments not to mention some beautiful birds and it comes with stitched shaped dies. Of course you can just purchase the stamp set by itself. But, why would you?  When you can get a 10% discount on the bundle! Awesome right!?

This is the card I made with the bundle and the beautiful paper! 


This paper is amazing! You can make anything with it and it looks stunning! Just pop a piece on a card base add a sentiment and ta-da! DONE!  This one is going out to a dear friend of mine so I wanted it to be extra special! And I love birds!! So why not?!

Here is a look at the bundle , in case you'd like to know what all is in it :) 

Ok, that's it for me! Thanks again for stopping by and happy hopping!!
If you'd like to see more of my creations then just hit the subscribe button and you can also follow me on facebook. I am doing a Wicked Wednesday theme throughout the month and giving away prizes too! You can find me Here


Thanks!
Robin

Tuesday, September 24, 2019

Christmas countdown project kit /bonus!

Do you like advent calendars??
 If you said yes or even... I’m not sure lol. I’ve got the kit for you!!
This project kit is sooo super easy!!  Beautiful too. It has everything you need included. It does have a stamp set that you can use to add to it, but you don’t have to have it to complete the advent calendar.


Isn’t it pretty?!! But wait!!! There’s more!
Just by changing the papers you could totally make this into a birthday countdown...a November gratitude calendar, .... a vacation countdown, ..... or this...


I used the spooktacular Bash DSP and added some embellishments from some of our stamp sets and punches . Then printed out some numbers . Easy peasy!
 Now I have 2 advent calendars one for Halloween and one for Christmas! All you have to do is turn the boxes around. Since it has the notches to pull it out on both sides you can have 2 for 1! How awesome is that?!
  The possibilities are endless with this. Get some of our gorgeous papers and you could have a jewelry holder, an embellishment holder ... I could go on and on lol.

All of these products  can be found here.

Have a great day!

Robin


Monday, September 2, 2019

Smile

Hi and welcome!

Today I have a cute little card to show you featuring the stamp set called Capture the good. It’s brand new In this years catalog. I think it has a lot of potential to be used in all sorts of thingscards, scrapbooks, and journals just to name a few!

This is the stamp set...


Isn’t it cute!! Lots of possibilities with this one!
I thought I would use the main image as the background and the “focal image”... lol. Like that?? Focal.. camera... how I used that wording?? ... maybe it just amuses me 😂 . Ok , past the bad pun.
I used the shimmery white paper, but for some reason it’s coming off a little green in the pictures.


I also cut out the camera after I stamped it so that I could give it a little dimension and I cut the lens out with 2 different circle punches so I could pop it up. Here’s a close up so you can see that . I think it just adds a little something to cards when you pop them up with dimensionals.


A really simple card but I think it’s a cute  and quick!
If you like this stamp set you can find it here.

Have a great day!
Robin


Friday, August 23, 2019

First Frost DSP ~Pretty in Purple

Hi and welcome!  Today I have an awesome card from the First Frost DSP. That will be available on September 4th to purchase. If you love it like I do. I would say get it while you can! I expect the initial supply to sell out quickly. It is that gorgeous!  One side has beautiful photo images of snowy scenes and flowers... and the colors ...Oh my!! Just stunning, and the other side is silver and white . What’s not to love?!

 I can’t seem to put this paper down! Which is good, because I’ll let you in on a little secret.... I tend to hoard my paper and not want to cut in to it! Sshhh don’t tel anyone . Hahaha I know I’m not alone in this!


Just look at the colors and image, isn’t it pretty! I embossed the flap of the envelope and the 
folding banner with the new Scroll embossing folder that’s also in the new occasions catalog.  Then I took a few dues from 3 different sets and used vellum and shimmery white paper to add the leaves behind the front sentiment. 

This is the front flap. It opens to show a message underneath. 


Than you open the card and see the inside. Isn’t that a cool fun fold card?  You can add a couple different sentiments and still have room to write your message😊

Thanks for stopping by! If you love this DSP like I do it will be available September 4, 2019 and you can purchase it here.
Have a great day! 
Robin


Monday, August 12, 2019

Demonstrator Blog Hop August 2019


Hi and welcome!! I am so glad you could stop by :)

Today I have a card that I made with the Wish for it all stamp set . It’s an awesome set that could be used for any kind of celebration. There are also some images like the doily that could be used for anything really.

I decided to make a birthday card with this set. Since I’m always needing birthday cards.
I also used a several colors and a lot of the images from the stamp set to make the background.


 Aren’t those just happy fun colors? I used gorgeous grape, melon mambo, lemon lime twist and  coastal cabana. I also used the rectangle stitched shapes to cut out the layer I stamped the cake on. For an extra layer I used two of the stitches shapes to make the frame in lemon lime twist  that I put behind the main image. Then for the finishing touch I used the banner from the Doily Wishes Dies that go with this stamp set and stamped one of the sentiments from the stamps.


Aren’t those dies fantastic?!  Especially the doily and those awesome candles! I can see a card just using the candle dies and a sentiment and bam! Birthday card done! Quick and easy! I think I’m going to have to give that a try next :) 

Thanks so much for stopping by my blog. Don’t forget to visit all the awesome demonstrators on this hop. I’m sure you’ll get a bunch of terrific ideas along the way. 

If you like anything I’ve shown today you can get them here

Have a great day! 

Robin


Saturday, June 1, 2019

New 2019-2021 In- Color Club


Hello and Welcome!

The new catalog is about to be unveiled in 3 more days! Can you believe it?

I am so excited there are so many awesome products in the catalog that I may just have to take out a loan! LOL  With a new catalog comes new in-colors!  I have to be honest. Some of them I wasn't sure I would like, but the more I use them the more I like them!

If you're like me you will want it all, but the budget won't allow for that.... so if you want to get all the new in-colors and all the accessories that go with it. I have just the thing for you.

I am hosting an In-Color Club. For 5 months I will send out one of the In-Colors and all the matching accessories that go with it.

OPTION #1 $39.00 each month. This includes the Shipping and Handling.
You will receive:


1~ Stampin' Pad
1~ Stampin' Refill
1~ Set of matching Blends Markers
2` yards of  Ribbon
Coordinating Faceted Dot Embellishments
8~ 6x6 Sheets of the In-Color Designer Series Paper
8~  Matching Cardstock Bases

To purchase the In-Colors and coordinating accessories it would be $180.95 including shipping.

OPTION #2

Add on the matching  Stampin' Write Marker $44.00 each month this includes the Shipping and Handling. 

What an awesome way to get all the new In-Colors without the up front investment!! 

The Terracotta Tile does not have a matching Blend Marker, you can pick another color in the blends and I will send you the pair in the color you choose. Or you can pick something else of equal value.


To order this just send me an e-mail at robinperkey@yahoo.com 

Thanks for stopping by!! 


Monday, February 11, 2019

International Blog hop Home to Roost


Hi and welcome!! It’s time for our monthly blog hop and I’ve got a cute little card that I made using the free Sale-a-bration stamp set Home to Roost.

 I’m a southern girl so I love roosters and this one is super cute! It also has some of the wheat and cat-tails that can be used as a background or all on its own. It also comes with sentiments so it really is a great little stamp set.


I decided to take the rooster and make him the focal point. I used my blends to color him in. I also used my wood plank embossing folder and ran my ink pad over top of it gently to define the wood look  score I ran it through my big shot.

This is the stamp set. Isn’t it cute!
Thanks so much for stopping by . If you like any of the items I’ve used you can find them here. Check out all the other projects from the wonderful demonstrators on this hop😊


Monday, January 28, 2019

Beauty Abounds

Hello! Welcome to my blog :)

Who doesn't love butterflies??  I know I do, and Stampin' Up didn't dissapoint with their new catalog that just came out on January 3rd.

There are 2 sets of stamps that have gorgeous butterflies, not to mention paper that you can get FREE!  Yep, FREE.

Today I used the Beauty Abounds and some of the thinlits to make this card. These thinlits have some awesome pieces in it. Lots of small butterflies to make it easy to get several in one pass on your Big Shot!

The two larger dies can be put together to add more colors and give it a great look. 
I used Highland Heather and Basic Black and then cut the bottom two butterflies off to add to my card. I also cut out the small butterfly that is showing a side view to layer onto a stamped butterfly as you can see on the right side of the card. 

I really love this stamp set. It has the background stamps like the bokeh dots that you see and it also has a little splotchy stamp also ... a real technical term hahaha... I added in a little Granny Apple Green also. I think those colors really go well together.

For the circle I used my go to Stitched Shapes Framelits Dies. I absolutely love these and the stitching all around really adds something to it I think. 
Well, that's it for me today. If you are looking for any of these products you can find them over at my store HERE

Thanks for stopping by and have a great day! 


Sunday, January 27, 2019

A little note with Butterfly Gala

Hello and welcome! I just can’t seem to stop playing with the beautiful Butterfly Gala bundle that is in our new Occasions catalog!

It’s just so easy to make a card  with the punch and the free coordinating  paper that you can get from the Sale-a-Bration catalog.

I’m playing a game over on my Facebook page called HOW LONG DID IT TAKE TO MAKE??
I am somewhat of a procrastinating perfectionist.... is there such a thing??  Well if there is then I fit the bill. I think of a card I want to do but then can’t decide if I want this paper or that one for the strip off designer paper or maybe I should use this one for the circle?  I hate cutting into gorgeous paper because I don’t want to waste it just to get a circle from it. 🙄🙄

Now I will say,  that I decided on my papers that I was going to  use and where I was putting them so I’d know what size to cut them. Let’s face it if you had to add in my looonngg  thought process it would be all day haha, and this is the final outcome!

The DSP that you can get free really makes this card!  Stampin’ Up is really stepping up their game. Those gorgeous butterflies on my card are from the paper and fit the punch!! How much simpler can you get. I didn’t have to stamp them, color them and then cut them out. Just took my punch and punched them straight from the beautiful paper!! 

See!! 


I also used this embossing folder , can I just say yummy...

Love the look the tufted embossing folder gives the paper.  


This set was so popular that the punch is on back order. But don't fret... it will be back ! So keep your eye out if it's a bundle you'd love to have!! Also in case you didn't know we have the Beauty abounds butterfly bundle that comes with framelits and could be used instead of the ones that I have on this card. I will have another post tomorrow showing a card I made with that set! 

Thanks for coming by my blog and visiting with me! 

Supplies that I used can be found on my website here

Have a great day :)


World of Good and Sailing Home

  Thank you for joining  us today for our Demonstrator Monthly Team Blog Hop!   We are Stampin' Up!® Demonstrators fr...